Visualize and manage your GitHub deployments
This guide demonstrates how to bring your GitHub deployment experience into Port.
You will learn how to:
- Ingest GitHub workflow run data into Port's software catalog using Port's GitHub integration.
- Set up self-service actions to manage deployments (trigger, retry, and cancel).
- Build dashboards in Port to monitor and take action on your GitHub deployments.


Common use cases
- Monitor the status and health of all GitHub deployments across accounts from a single dashboard.
- Empower platform teams to automate day-2 operations via webhooks.
Prerequisites
This guide assumes the following:
- You have a Port account and have completed the onboarding process.
- Port's GitHub integration is installed in your account.
Set up data model
The GitHub Workflow and GitHub Workflow Run blueprints are not created automatically when installing the GitHub integration, so we will need to create them manually.
Create the GitHub workflow blueprint
-
Go to the Builder page of your portal.
-
Click on
+ Blueprint. -
Click on the
{...}button in the top right corner, and chooseEdit JSON. -
Add this JSON schema:
GitHub Workflow blueprint (Click to expand)
{
  "identifier": "githubWorkflow",
  "title": "Workflow",
  "icon": "Github",
  "schema": {
    "properties": {
      "path": {
        "title": "Path",
        "type": "string"
      },
      "status": {
        "title": "Status",
        "type": "string",
        "enum": [
          "active",
          "deleted",
          "disabled_fork",
          "disabled_inactivity",
          "disabled_manually"
        ],
        "enumColors": {
          "active": "green",
          "deleted": "red"
        }
      },
      "createdAt": {
        "title": "Created At",
        "type": "string",
        "format": "date-time"
      },
      "updatedAt": {
        "title": "Updated At",
        "type": "string",
        "format": "date-time"
      },
      "deletedAt": {
        "title": "Deleted At",
        "type": "string",
        "format": "date-time"
      },
      "link": {
        "title": "Link",
        "type": "string",
        "format": "url"
      }
    },
    "required": []
  },
  "mirrorProperties": {},
  "calculationProperties": {},
  "relations": {
    "repository": {
      "title": "Repository",
      "target": "service",
      "required": false,
      "many": false
    }
  }
} -
Click
Saveto create the blueprint.
Create the GitHub workflow run blueprint
-
Go to the Builder page of your portal.
-
Click on
+ Blueprint. -
Click on the
{...}button in the top right corner, and chooseEdit JSON. -
Add this JSON schema:
GitHub workflow run blueprint (Click to expand)
{
  "identifier": "githubWorkflowRun",
  "title": "Workflow Run",
  "icon": "Github",
  "schema": {
    "properties": {
      "name": {
        "title": "Name",
        "type": "string"
      },
      "triggeringActor": {
        "title": "Triggering Actor",
        "type": "string"
      },
      "status": {
        "title": "Status",
        "type": "string",
        "enum": [
          "completed",
          "action_required",
          "cancelled",
          "startup_failure",
          "failure",
          "neutral",
          "skipped",
          "stale",
          "success",
          "timed_out",
          "in_progress",
          "queued",
          "requested",
          "waiting"
        ],
        "enumColors": {
          "queued": "yellow",
          "in_progress": "yellow",
          "success": "green",
          "failure": "red"
        }
      },
      "conclusion": {
        "title": "Conclusion",
        "type": "string",
        "enum": [
          "completed",
          "action_required",
          "cancelled",
          "startup_failure",
          "failure",
          "neutral",
          "skipped",
          "stale",
          "success",
          "timed_out",
          "in_progress",
          "queued",
          "requested",
          "waiting"
        ],
        "enumColors": {
          "queued": "yellow",
          "in_progress": "yellow",
          "success": "green",
          "failure": "red"
        }
      },
      "createdAt": {
        "title": "Created At",
        "type": "string",
        "format": "date-time"
      },
      "runStartedAt": {
        "title": "Run Started At",
        "type": "string",
        "format": "date-time"
      },
      "updatedAt": {
        "title": "Updated At",
        "type": "string",
        "format": "date-time"
      },
      "runNumber": {
        "title": "Run Number",
        "type": "number"
      },
      "runAttempt": {
        "title": "Run Attempts",
        "type": "number"
      },
      "link": {
        "title": "Link",
        "type": "string",
        "format": "url"
      }
    },
    "required": []
  },
  "mirrorProperties": {},
  "calculationProperties": {},
  "relations": {
    "workflow": {
      "target": "githubWorkflow",
      "required": true,
      "many": false
    }
  }
} -
Click
Saveto create the blueprint.
Update the integration mapping
-
Go to the data Sources page of your portal.
-
Select the GitHub integration.
-
Add the following YAML block into the editor to ingest workflows and workflow runs from your GitHub account:
GitHub integration configuration (Click to expand)
deleteDependentEntities: true
createMissingRelatedEntities: true
enableMergeEntity: true
resources:
  - kind: repository
    selector:
      query: "true"
    port:
      entity:
        mappings:
          identifier: .name
          title: .name
          blueprint: '"service"'
          properties:
            readme: file://README.md
            url: .html_url
            defaultBranch: .default_branch
  - kind: workflow
    selector:
      query: 'true'
    port:
      entity:
        mappings:
          identifier: .repo + (.id|tostring)
          title: .name
          blueprint: '"githubWorkflowApp"'
          properties:
            path: .path
            status: .state
            createdAt: .created_at
            updatedAt: .updated_at
            link: .html_url
          relations:
            repository: .repo
  - kind: workflow-run
    selector:
      query: "true"
    port:
      entity:
        mappings:
          identifier: .repository.name + "/" + (.id|tostring)
          title: .display_title
          blueprint: '"githubWorkflowRun"'
          properties:
            name: .name
            triggeringActor: .triggering_actor.login
            status: .status
            conclusion: .conclusion
            createdAt: .created_at
            runStartedAt: .run_started_at
            updatedAt: .updated_at
            deletedAt: .deleted_at
            runNumber: .run_number
            runAttempt: .run_attempt
            link: .html_url
          relations:
workflow: .repository.name + (.workflow_id|tostring) -
Click
Save & Resyncto apply the mapping.
Set up self-service actions
We will create self-service actions in Port to directly interact with the GitHub API using webhooks. These actions let users:
-
Trigger a new workflow run.
-
Re-run failed or cancelled workflow runs.
-
Cancel a running workflow run.
To implement these use-cases, follow the steps below:
Add Port secrets
To add a secret to your portal:
-
Click on the
...button in the top right corner of your Port application. -
Click on Credentials.
-
Click on the
Secretstab. -
Click on
+ Secretand add the following secrets:_GITHUB_TOKEN: A GitHub personal access token with fine-grained access tokens for "Actions" repository permissions (write). This permission is required to execute all three actions (trigger, re-run, and cancel workflow runs). To obtain this token, see the GitHub documentation.
Trigger a new workflow run
-
Go to the self-service page of your portal.
-
Click on the
+ New Actionbutton. -
Click on the
{...} Edit JSONbutton. -
Copy and paste the following JSON configuration into the editor.
Trigger a new workflow run action (Click to expand)
Replace GitHub OrganizationMake sure to replace
<YOUR_GITHUB_ORG>with your actual GitHub organization name in the webhook URL.{
"identifier": "trigger_workflow_run",
"title": "Trigger Workflow Run",
"icon": "Github",
"description": "Triggers a GitHub workflow run in the specified repository",
"trigger": {
"type": "self-service",
"operation": "DAY-2",
"userInputs": {
"properties": {
"environment": {
"icon": "DefaultProperty",
"title": "Environment",
"type": "string",
"default": "test",
"enum": [
"test",
"staging",
"production"
],
"enumColors": {
"test": "lightGray",
"staging": "lightGray",
"production": "lightGray"
}
}
},
"required": [],
"order": [
"environment"
]
},
"blueprintIdentifier": "githubWorkflow"
},
"invocationMethod": {
"type": "WEBHOOK",
"url": "https://api.github.com/repos/<YOUR_GITHUB_ORG>/{{ .entity.relations.repository }}/actions/workflows/{{ .entity.properties.path | split(\"/\")[-1] }}/dispatches",
"agent": false,
"synchronized": true,
"method": "POST",
"headers": {
"Accept": "application/vnd.github+json",
"Authorization": "Bearer {{ .secrets._GITHUB_TOKEN }}",
"X-GitHub-Api-Version": "2022-11-28",
"Content-Type": "application/json"
},
"body": {
"ref": "main",
"inputs": {
"environment": "{{ .inputs.environment }}"
}
}
},
"requiredApproval": false
} -
Click
Save.
Now you should see the Trigger workflow run action in the self-service page. 🎉
Re-run workflow runs
-
Go to the Self-service page of your portal.
-
Click on the
+ New Actionbutton. -
Click on the
{...} Edit JSONbutton. -
Copy and paste the following JSON configuration into the editor.
Re-run workflow runs action (Click to expand)
Replace GitHub OrganizationMake sure to replace
<YOUR_GITHUB_ORG>with your actual GitHub organization name in the webhook URL.{
"identifier": "rerun_workflow_run",
"title": "Re-run Workflow Run",
"icon": "Pipeline",
"description": "Re-run failed or cancelled workflow runs",
"trigger": {
"type": "self-service",
"operation": "DAY-2",
"userInputs": {
"properties": {},
"required": [],
"order": []
},
"condition": {
"type": "SEARCH",
"rules": [
{
"property": "conclusion",
"operator": "in",
"value": [
"failure",
"cancelled"
]
}
],
"combinator": "and"
},
"blueprintIdentifier": "githubWorkflowRun"
},
"invocationMethod": {
"type": "WEBHOOK",
"url": "https://api.github.com/repos/<YOUR_GITHUB_ORG>/{{ .entity.identifier | split(\"/\")[0] }}/actions/runs/{{ .entity.identifier | split(\"/\")[-1] }}/rerun-failed-jobs",
"agent": false,
"synchronized": true,
"method": "POST",
"headers": {
"Accept": "application/vnd.github+json",
"Authorization": "Bearer {{ .secrets._GITHUB_TOKEN }}",
"X-GitHub-Api-Version": "2022-11-28"
}
},
"requiredApproval": false
} -
Click
Save.
Now you should see the Re-run workflow run action in the self-service page. 🎉
Cancel a running workflow run
-
Go to the Self-service page of your portal.
-
Click on the
+ New Actionbutton. -
Click on the
{...} Edit JSONbutton. -
Copy and paste the following JSON configuration into the editor.
Cancel a running workflow run action (Click to expand)
Replace GitHub OrganizationMake sure to replace
<YOUR_GITHUB_ORG>with your actual GitHub organization name in the webhook URL.{
"identifier": "cancel_workflow_run",
"title": "Cancel Workflow Run",
"icon": "Unavailable",
"description": "Cancel a running workflow run",
"trigger": {
"type": "self-service",
"operation": "DAY-2",
"userInputs": {
"properties": {},
"required": [],
"order": []
},
"blueprintIdentifier": "githubWorkflowRun"
},
"invocationMethod": {
"type": "WEBHOOK",
"url": "https://api.github.com/repos/<YOUR_GITHUB_ORG>/{{ .entity.identifier | split(\"/\")[0] }}/actions/runs/{{ .entity.identifier | split(\"/\")[-1] }}/cancel",
"agent": false,
"synchronized": true,
"method": "POST",
"headers": {
"Accept": "application/vnd.github+json",
"Authorization": "Bearer {{ .secrets._GITHUB_TOKEN }}",
"X-GitHub-Api-Version": "2022-11-28"
}
},
"requiredApproval": false
} -
Click
Save.
Now you should see the Cancel workflow run action in the self-service page. 🎉
Visualize metrics
With workflow runs ingested and actions configured, the next step is building a dashboard to monitor GitHub data directly in Port. We can visualize all workflow run details using customizable widgets. In addition, we can trigger remediation workflows right from your dashboard.
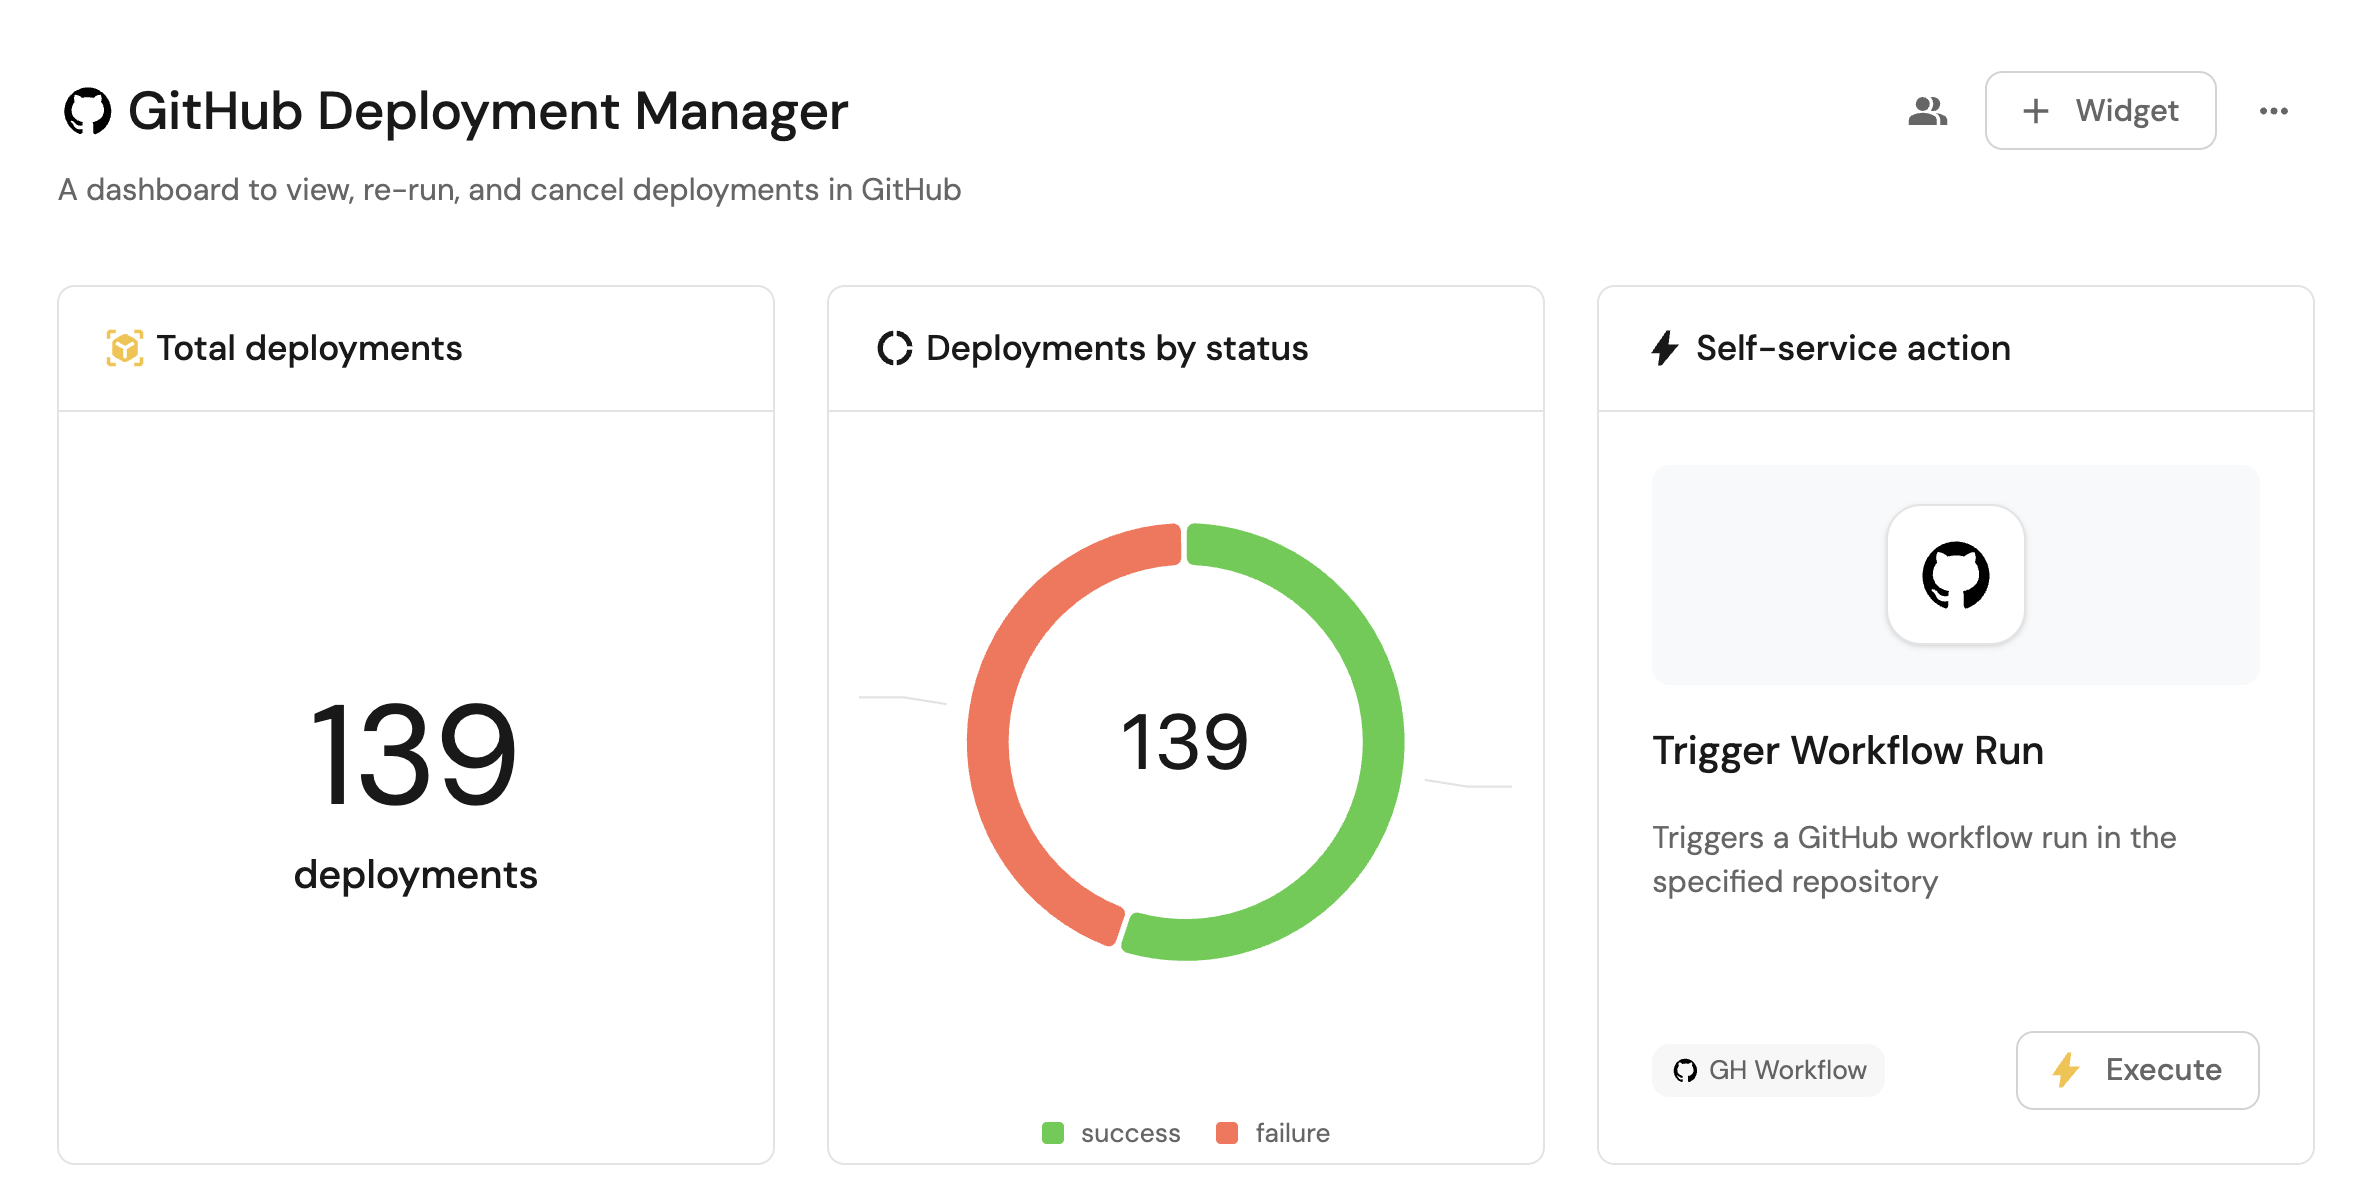
Create a dashboard
- Navigate to the Catalog page of your portal.
- Click on the
+ Newbutton in the left sidebar. - Select New dashboard.
- Name the dashboard GitHub Deployment Manager.
- Input
A dashboard to view, re-run, and cancel deployments in GitHubunder Description. - Select the
Githubicon. - Click
Create.
We now have a blank dashboard where we can start adding widgets to visualize insights from our GitHub deployments.
In this guide, we define deployments as workflow runs with deployment-related names by looking for specific keywords in the workflow name:
- "deploy" - Captures workflows like
deploy.yml,deploy-to-production.yml - "CD" - Captures continuous deployment workflows
- "production" - Captures production deployment workflows
- "staging" - Captures staging deployment workflows
You can customize these filters based on your workflow naming conventions.
Alternatively, instead of using workflow runs with naming strategies, you can ingest GitHub's native deployment data directly. You can map these using the deployment resource kind in your integration configuration, as shown in our GitHub integration examples.
Add widgets
In the new dashboard, create the following widgets:
Total deployments created in the last 3 months (click to expand)
-
Click
+ Widgetand select Number Chart. -
Title:
Total deployments(add theDeploymenticon). -
Select
Count entitiesChart type and choose GitHub Workflow Run as the Blueprint. -
Select
countfor the Function. -
Add this JSON to the Additional filters editor to filter deployments created in the last 3 months:
[
    {
        "combinator":"and",
        "rules":[
            {
                "property":"$title",
                "operator":"contains",
                "value":"deploy"
            },
            {
                "property":"createdAt",
                "operator":"between",
                "value":{
                "preset":"last3Months"
                }
            }
        ]
    }
] -
Select
customas the Unit and inputdeploymentsas the Custom unit. -
Click
Save.
Deployment by status (click to expand)
-
Click
+ Widgetand select Pie chart. -
Title:
Deployments by status(add theDeploymenticon). -
Choose the GitHub Workflow Run blueprint.
-
Under
Breakdown by property, select the Conclusion property -
Add this JSON to the Additional filters editor to filter deployments:
{
  "combinator": "or",
  "rules": [
    {
      "property": "$title",
      "operator": "contains",
      "value": "deploy"
    },
    {
      "property": "$title",
      "operator": "contains",
      "value": "production"
    },
    {
      "property": "$title",
      "operator": "contains",
      "value": "CD"
    },
    {
      "property": "$title",
      "operator": "contains",
      "value": "staging"
    }
  ]
} -
Click Save.
Trigger workflow run action (click to expand)
- Click
+ Widgetand select Action card. - Choose the Trigger Workflow Run action we created in this guide.
- Click Save.
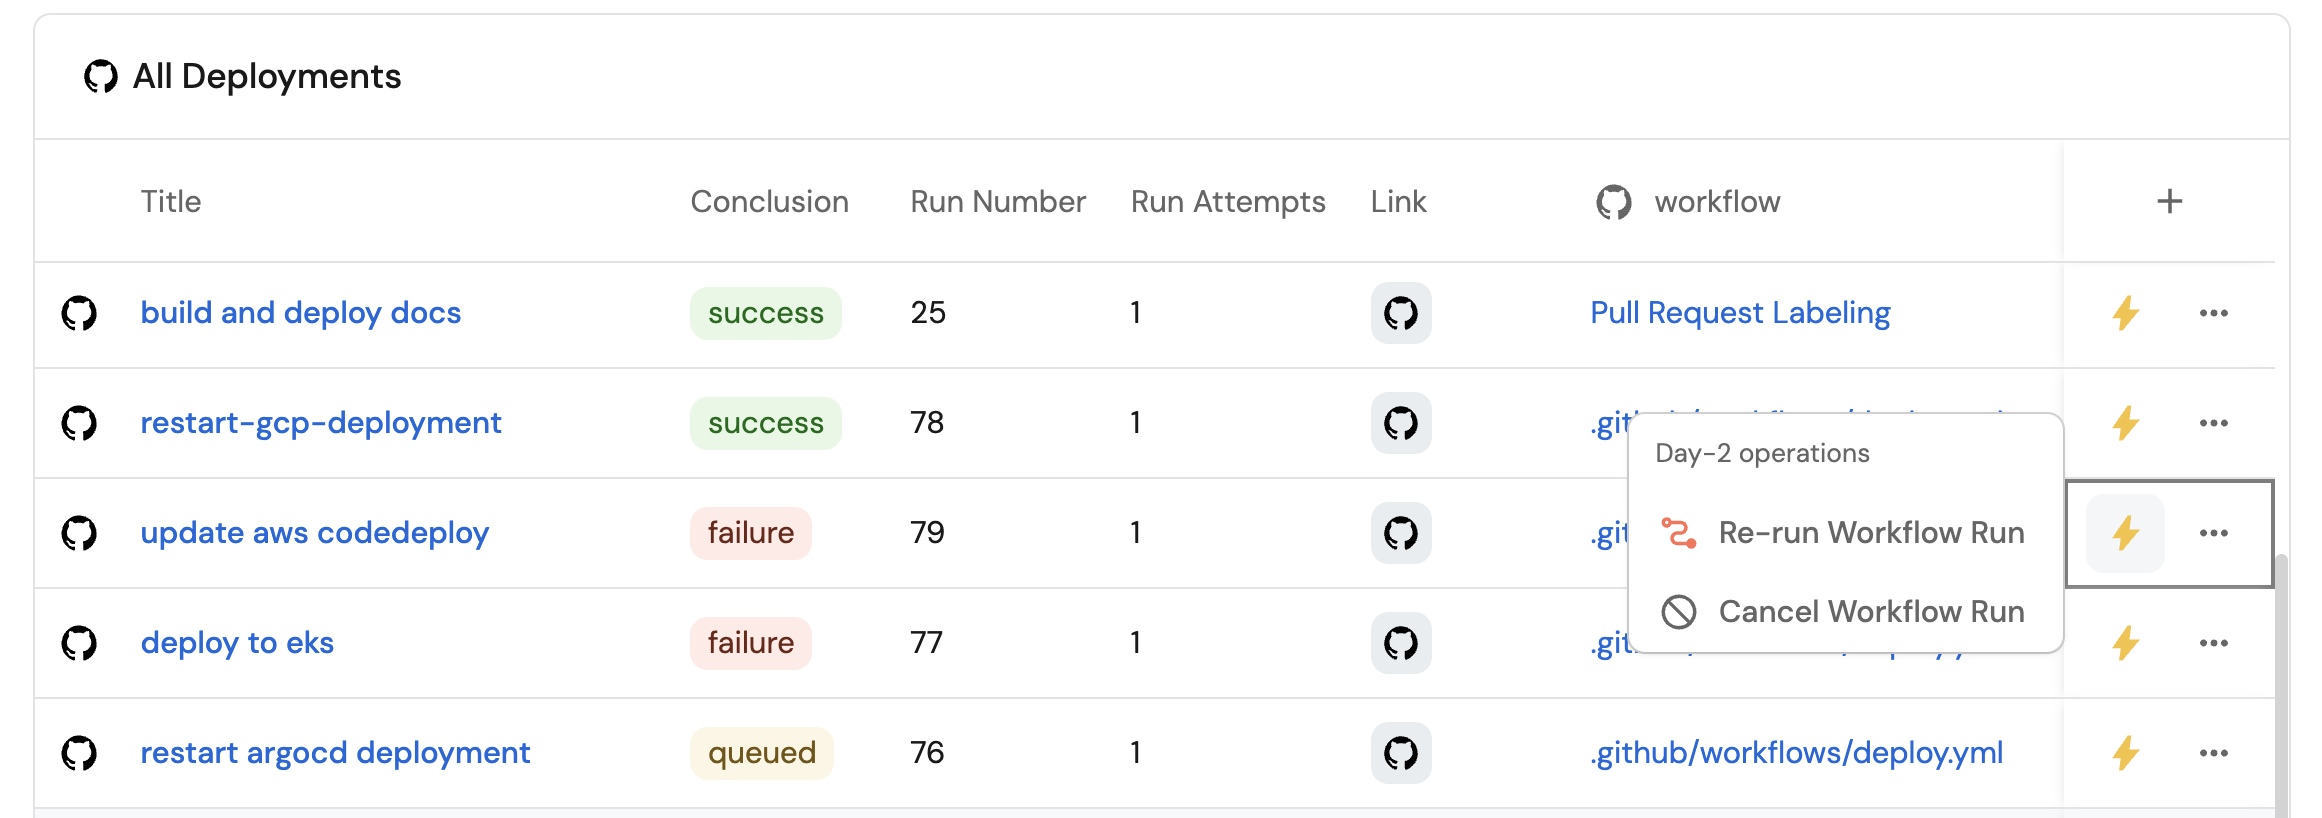
All GitHub deployments view (click to expand)
-
Click
+ Widgetand select Table. -
Title the widget All Deployments.
-
Choose the GitHub Workflow Run blueprint.
-
Add this JSON to the Additional filters editor to filter deployments:
{
  "combinator": "or",
  "rules": [
    {
      "property": "$title",
      "operator": "contains",
      "value": "deploy"
    },
    {
      "property": "$title",
      "operator": "contains",
      "value": "production"
    },
    {
      "property": "$title",
      "operator": "contains",
      "value": "CD"
    },
    {
      "property": "$title",
      "operator": "contains",
      "value": "staging"
    }
  ]
} -
Click Save to add the widget to the dashboard.
-
Click on the
...button in the top right corner of the table and select Customize table. -
In the top right corner of the table, click on
Manage Propertiesand add the following properties:- Conclusion: The conclusion of the workflow run.
- Link: The URL to the workflow run.
- Created At: The date the workflow run was created in GitHub.
- Run Number: The run number of the workflow.
- Run Attempts: The number of attempts for this workflow run.
-
Click on the save icon in the top right corner of the widget to save the customized table.